T.M.A.S. - Shopify P.O.S. Integration
Learn how to quickly and easily integrate your Shopify Point of Sale system with the T.M.A.S. platform for a streamlined experience.
Table of Contents

Shopify Integration Update:
Shopify updated its API access process in January 2026, and generating an API Token now requires additional steps.
Until a new release later this year restores the standard self-service setup process, please contact our Technical Support team for information on the required steps and to book an appointment for the setup by live chat at help.storetraffic.com or email at techsupport@storetraffic.com.
T.M.A.S. allows for the integration of each of your locations' Shopify accounts so that it can import the following data.
- Sales Data
- Transactional Data
- Items Sold
Click Here to LEARN MORE about SMS Data Privacy Policy
Requirements
- Active T.M.A.S. Retail subscription or higher
- Aligned location ID of T.M.A.S. to match Shopify
- Shopify account which will be able to authorize T.M.A.S. integration
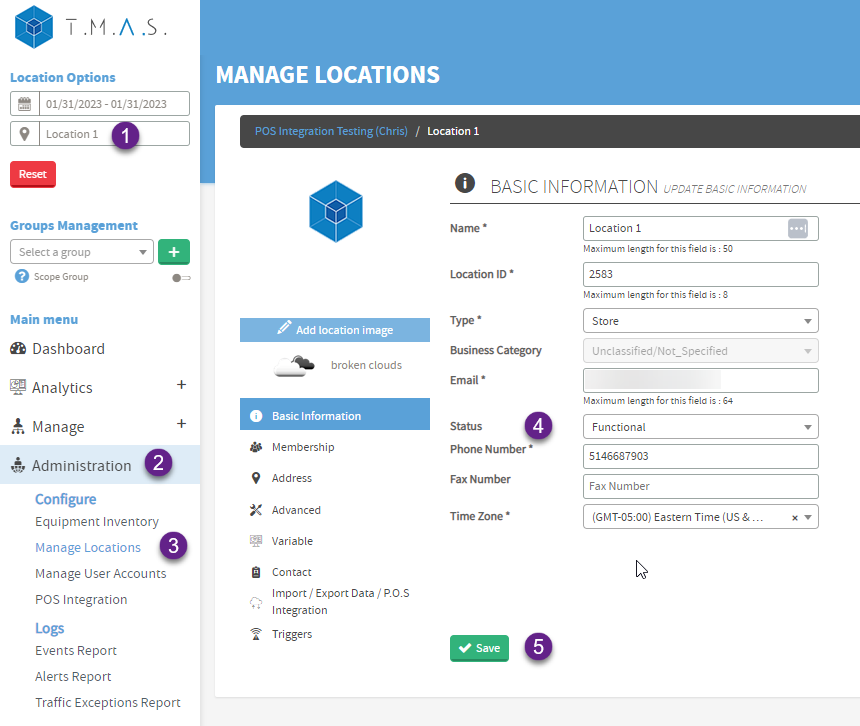
How to setup the integration
Verify and or Disable Manual Retail Dashboard editing
It is advisable to disable the manual editing feature if you have automated import or POS sync configured to avoid data conflicts. Verify your permissions, access user settings, and disable the manual editing option for users who no longer need access.
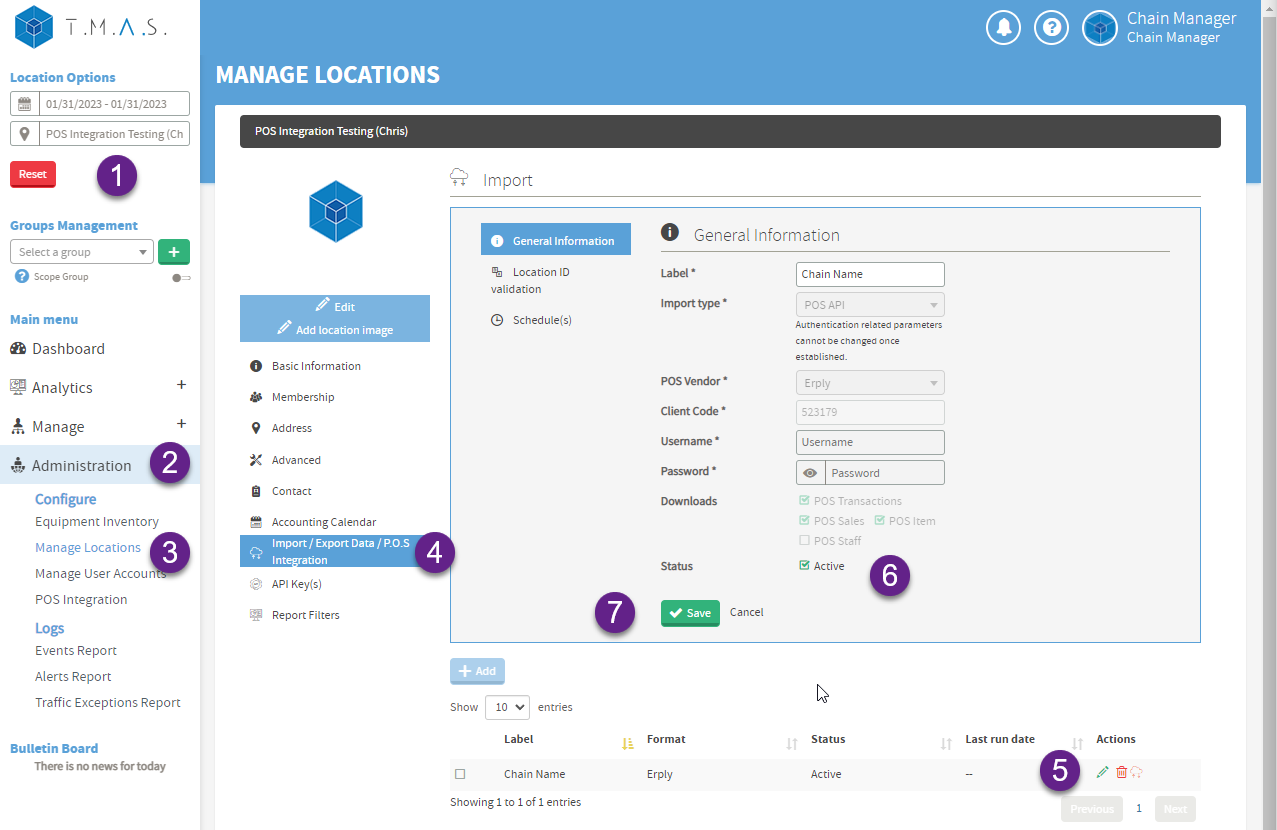
Setting up the Integration | |
| Finding the integration | |
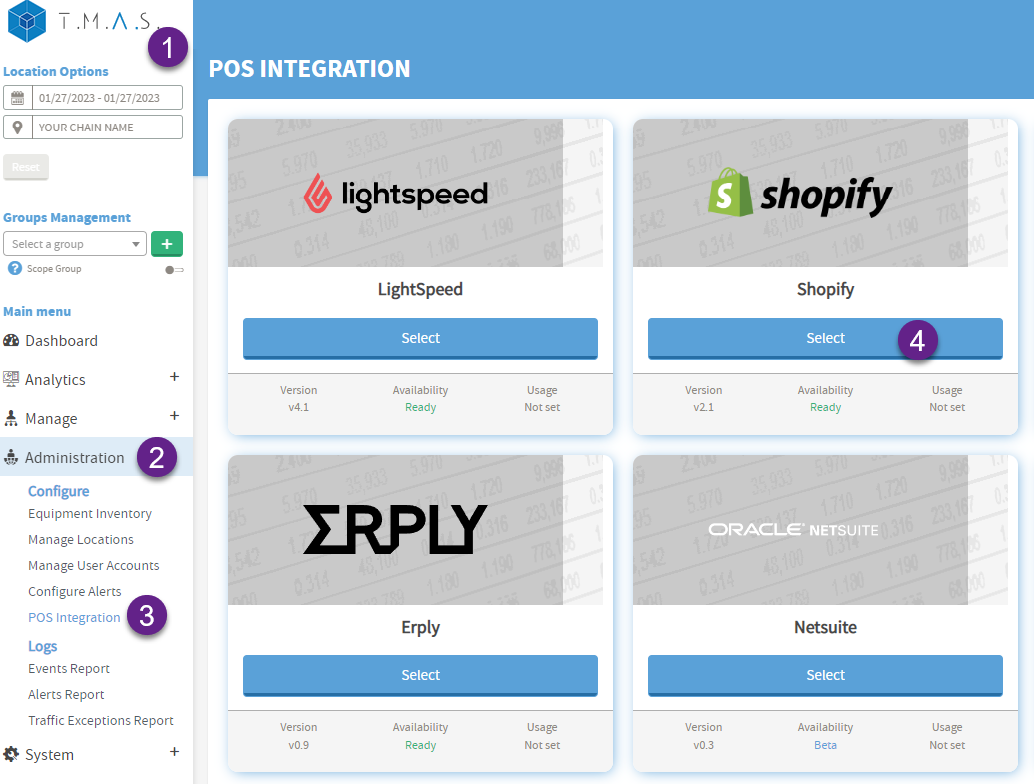 |
1. Login to T.M.A.S. 2. Expand Administration 3. Select POS Integration 4. Select Shopify |
 |
5. Input label (Example: Your business name) 6. Input your shopname only, do not include “.myshopify.com” (example in green: shopname.myshopify.com) 7. Input token obtained with SMS Techsupport aide. 8. Click Next |
Obtain the Shopify Location ID | |
  
|
9. Login to Shopify 10. Select Settings 11. Select Locations 12. Click on the location 13. Take note of the last 4 digits of the location # in the browser URL (address bar), this is the store ID of Shopify. Repeat for any other locations on the account.
WarningYou might encounter an issue loading the "Location ID Validation" during setup.
|
| Match Location ID between Shopify and T.M.A.S. | |
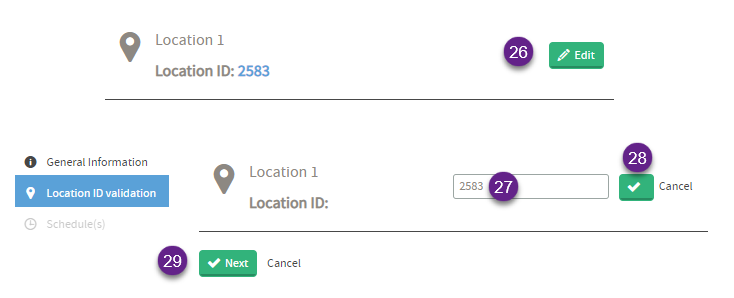 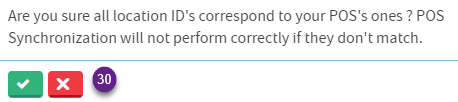 |
14. Edit Location 15. Update ID to match Shopify 16. Click checkmark to save 17. Click Next 18. Verify and click yes to following message |
| Setting an Import Schedule | |
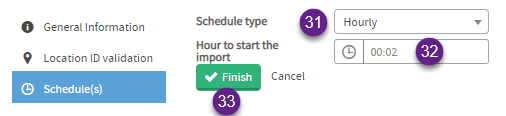 |
19. Select Hourly 20. Set time to 00:02 21. Click Finish |
Success The setup is complete, and you should see data populating in the dashboard and reports at the top of the next hour according to your scheduling settings. To verify the data, generate a Totaling or Data Export report. | |
How to Disable / Enable or Remove the Integration | |
| Disable Single or Multiple locations - Change Location Status | |
 |
|
| Disable - All Locations | |
 |
|
| Removing the Integration in T.M.A.S. | |
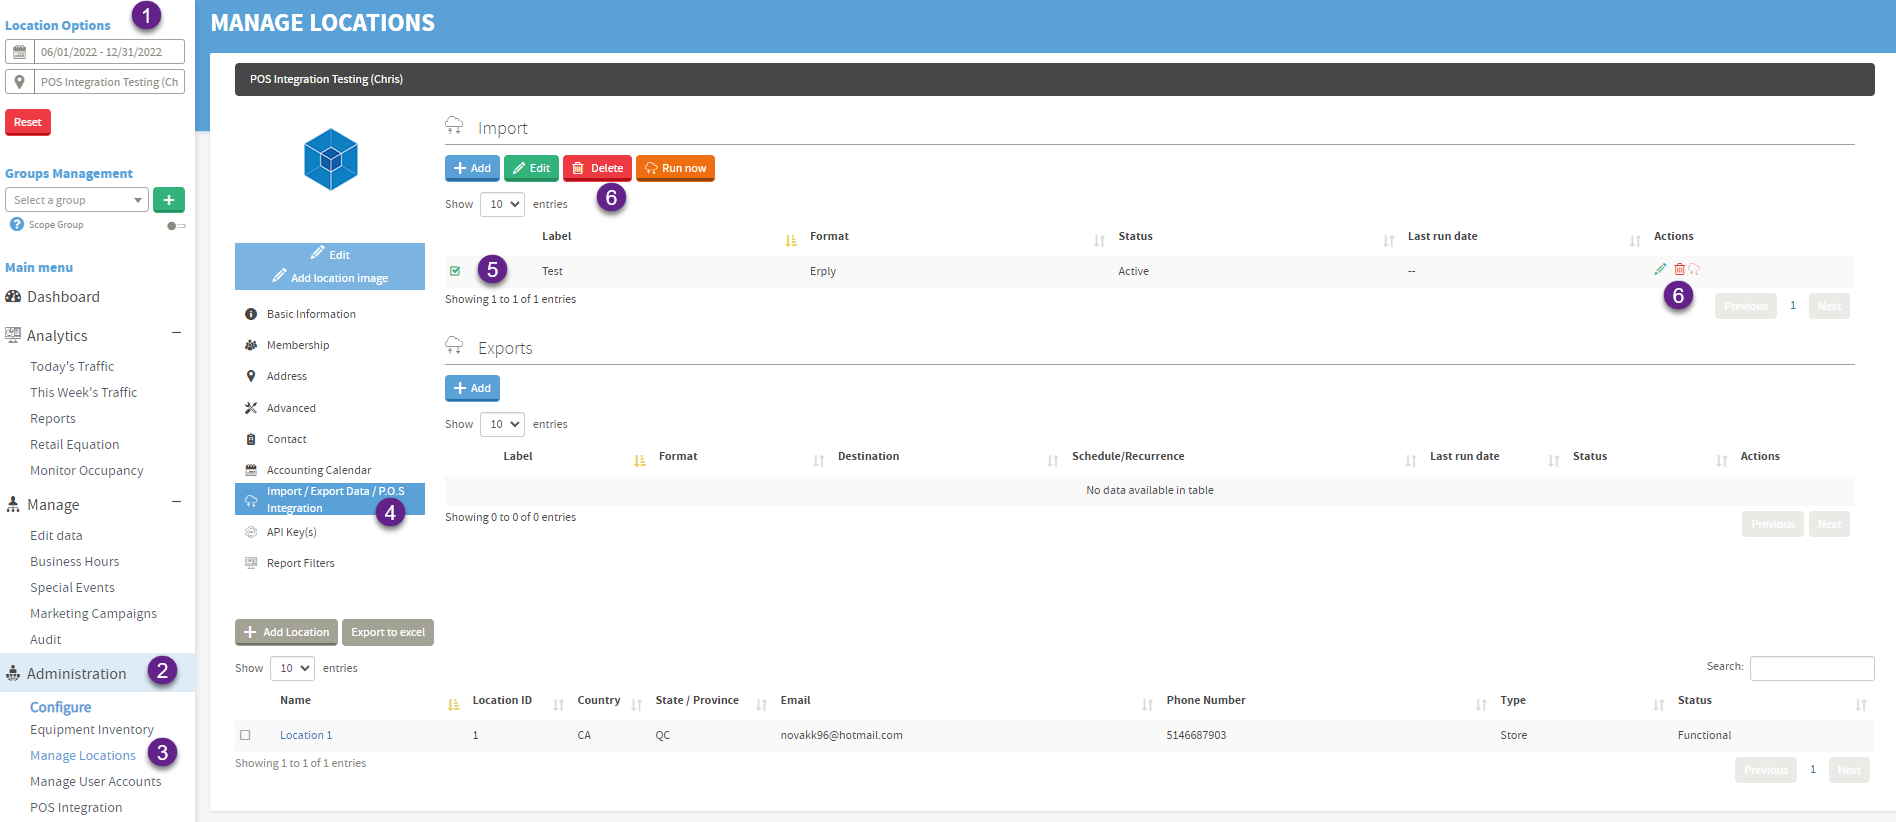 |
|
| Removing the Custom App from Shopify | |
| Click uninstall in Shopify from the app listing, this will stop any further reading of data from the account. As for any data which is residing in T.M.A.S., Click Here to LEARN MORE about SMS Data Privacy Policy. | |
F.A.Q. |
| Q: Why does total sales from Shopify, NOT match total sales figures shown in T.M.A.S.? |
| A: T.M.A.S. imports Net Sales from Shopify, therefore, Shopify reports which show the net sales figures, and not gross sales figures, will match T.M.A.S. . |
| Q: Why does the Average order value from Shopify Reports NOT match Average sale in T.M.A.S.? |
| A: Average order value from Shopify is based on gross sales, while Average sale in T.M.A.S. is based on net sales, and this is what is imported from Shopify. |
| Q: Why does total Orders from Shopify reports NOT match total Transactions from T.M.A.S.? |
| A: Shopify does not count a return as an order, where a return is considered as a transaction in T.M.A.S. . |
| Q: Does T.M.A.S. import my online sales? |
| A: No, Online and Store sales are separated in Shopify by different channels, T.M.A.S. imports only the POS Store channel sales, not the Online Store channel. |
| Q: Why don’t some returns appear immediately when using Shopify, and does it affect my TMAS sales reports? |
|
A: In Shopify, if a customer returns an item and takes an immediate refund, the return is properly recorded and everything matches up. Because of this, it might appear that there are extra sales without matching returns. |
| Q: All locations are syncing data expect for 1 or 2 locations. |
| A: Make sure that the location's ID is correct in T.M.A.S., and that that store status is set to functional (see section “Obtain the Shopify Location ID” in this article). |
| Q: Can staff be imported from Shopify? |
| A: No, SMS Storetraffic is not currently aware of a clock-in/out function which has been integrated from the Shopify POS. |
| Q : My intergration has stopped working, but is still shown as active T.M.A.S. |
|
A: Possible reason : The Custom App was removed; the person who set up integration was removed from Shopify
2) If T.M.A.S. is still visible in Custom Apps, verify if location ID's are correct
|
| Q: How do I import staff hours if they don’t sync from Shopify POS? |
|
A: If staff hours aren’t syncing, you can manually upload a CSV file via FTP. Make sure the Staff box is unchecked in your Shopify POS integration settings.
|
|
Q: How can I create the Shopify view to compare data with T.M.A.S., and why should I use it?
You can create a custom Shopify Explorer view to compare your POS sales directly with your T.M.A.S. Totaling Reports, ensuring both systems are aligned. This view helps confirm that the data imported into T.M.A.S. reflects the actual Shopify transaction activity for the same time period. To create it: In Shopify, go to Analytics → Reports (or Explore in newer versions). Click Create custom report or New exploration. Choose Sales as your data source. Copy and paste this query:
Use this view because it: Focuses on Net Sales (excluding taxes and shipping), the same metric used in T.M.A.S. Breaks down sales hour by hour, matching T.M.A.S. report structure. Helps identify discrepancies between the two systems caused by refunds, rounding, or timing differences.
|